Showing posts with label rendering. Show all posts

Monday, August 6, 2018

Dreamcast Tutorial: Drawing a 3D Pyramid with OpenGL

Update (11/5/2019)


As of writing this, the default KGL libraries for KOS are basically deprecated.
It's recommended to use Kazade's GLdc libraries over on GitHub.

To install Kazade's GLdc libraries:

1. Go to your kos/addons folder
2. type: git clone https://github.com/Kazade/GLdc.git
3. type: cd GLdc
4. type: make defaultall
5. type: make create_kos_link

Then, in your makefile, include "-lGLdc" instead of "-lGL".
Here's my makefile for reference:


Note: Most of the functions from KGL carry over to GLdc, with one exception: glutSwapBuffers() is now glKosSwapBuffers().


In my last post, I explained how to draw a simple triangle using OpenGL. However, we STILL didn't have anything that remotely looked 3D! This time, however, we're going to go all-in! Instead of one triangle, we're going to draw 6 triangles!

...In a pyramid formation, anyway!


Relevant Example Projects


  • Anything in kos/examples/dreamcast/kgl
  • More specifically, anything in kos/addons/GLdc/samples
  • Even MORE specifically, kos/addons/GLdc/samples/nehe02


The Code


The code for this is a LOT more complex (imagine how big this would be if it were using the PVR directly!)

I could have comprised drawing the triangles into a separate function, but I wanted it to all be in one loop for clarity's sake! So, let's get into it.

Some Housekeeping Items


First off, we'll need to define a couple of variables to handle our position, control speed, rotation, and rotation speed. GLfloats are a special data type, provided by OpenGL. They work just like regular floats.

The Setup


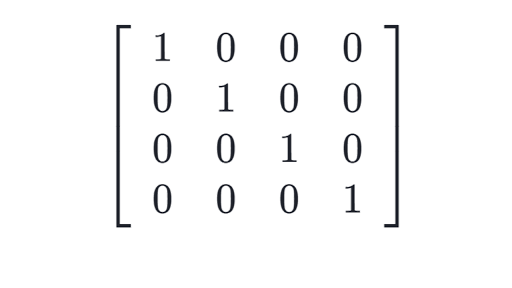
An identity matrix. Credit: KhanAcademy
Next, we need to setup our video mode and OpenGL just like last time!

However, this time we're going to go into some scary territory: Matrices! Truthfully, matrices are my Achilles heel. However, after taking a 3D Graphics course last school year, I'm a bit more comfortable with the concepts!

First off, we're going to start by loading in an identity matrix. An identity matrix is essentially a blank slate. It's a matrix that will do absolutely nothing when it's multiplied, added, divided, or subtracted from any other matrix.

We use this to work as a starting point to mish-mash a bunch of other matrices together to do our rotations, translations, and scaling. We'll multiply this one, big, messy matrix we've put together by our vertices' positions to tell it where to go, and how to angle itself. If it's a little confusing to you, and you'd like to know more on how matrix math works, I'd recommend looking up some tutorials and videos online to help better explain it!

In the case above: we're loading an identity matrix so that we can set up our perspective! After that, we switch our mode to "modelview" so that we know we're going to be affecting the position, rotation, and scale of objects as opposed to our perspective.

Lastly, we enable our depth test and give it a function to work from so that the GPU knows to stop drawing our triangles if they're behind another triangle.

The Loop

Here's where a lot of the craziness comes in! This is our draw loop. First, we handle our input (which will be talked briefly about below), then we clear our buffers like before, and then we load in another identity matrix to start from.

We use gluLookAt() to act as our camera. This function takes our position, filled in by xPos, yPos, and zPos, and then takes 3 other values to be where we're looking at. Lastly, we need to tell it what direction is up, which in this case is our y-axis.

We then tell the matrix we want to translate everything we're about to draw back by 1, and tell it we're going to want to rotate everything by rot*rotSpeed, using the y-axis so it spins around clockwise/counter-clockwise instead of on it's side or something!

Once we have our big mess of a matrix put together, we can start drawing! Every vertex after will be affected by this matrix we just put together.

The Vertices

We're going to have 3 vertices per face, and we have 6 faces to draw: 4 for the sides, and 2 for the base. Why do we need 2 for the base? Well, underneath the pyramid is now a square. Squares can be broken up into 2 triangles!

Sometimes it's really difficult to wrap your head around 3D coordinates, and how to connect them together, so I usually draw it out!

Some people are probably asking, "Tofu, why did you draw the bottom parts at -1 instead of 0?" And the answer to that question is that I'm a dumb-dumb who didn't think ahead of time!

As you can see, the bottom square is actually made up of 2 triangles, instead of just one! This is why we need 6, as opposed to 4 triangles to make up our pyramid. We could leave the bottom hollowed out, but I wanted to make a complete, whole pyramid.

We're also implementing a strategy I mentioned previously in my last tutorial: We're drawing from the top, forward to the left, then to the right, then back to the top so we can start our next triangle. I'm not entirely certain this is necessary, but it seemed to give me funky results when I didn't do it this way during tests!


The Controls


I won't go too in depth on this, since I've already had a tutorial about how to use the gamepad, but the only notable thing is that when I was adding the xPos instead of subtracting, the controls were inverted.

Here, you can see that the controls are setup so that A quits, Dpad right and left control the rotation speed, Dpad up and down control the zoom, and the joystick controls the X and Y position of the camera. You'll notice, upon testing this out for yourself, that the camera kinda rotates a bit while moving. This is because of that previously noted gluLookAt() function, which is actually trying to look at a specific point in the world. You can replace that with a glTransformf(), passing in xPos, yPos, and zPos to get rid of that effect, if you'd like.


And that's about it! One notable issue I had is that NullDC has crashed twice on me: once with this code and once with another similar project. I don't know the reason, since NullDC doesn't generate logs, but if I had to guess I'd wager it might have to do with rot going out of bounds or something

Further Learning


Learning is all about venturing into uncharted territories! The best way to learn is to experiment on your own, look at examples, read documentation, and google things! If you'd like to try to expand off this tutorial, I'd recommend trying:

  • Adding a second pyramid to the scene with it's own rotation and translation
  • Try changing the rotation to spin on a different axis
  • Enable back-face culling (You'll find I have a little mistake in how I rendered the triangles if you do this!)
Next time we'll look at a better, more optimized way of rendering out objects with OpenGL!

Dreamcast Tutorial: Drawing a Triangle in OpenGL

Update (11/5/2019)


As of writing this, the default KGL libraries for KOS are basically deprecated.
It's recommended to use Kazade's GLdc libraries over on GitHub.

To install Kazade's GLdc libraries:

1. Go to your kos/addons folder
2. type: git clone https://github.com/Kazade/GLdc.git
3. type: cd GLdc
4. type: make defaultall
5. type: make create_kos_link

Then, in your makefile, include "-lGLdc" instead of "-lGL".
Here's my makefile for reference:


Note: Most of the functions from KGL carry over to GLdc, with one exception: glutSwapBuffers() is now glKosSwapBuffers().


I've already covered how one would draw a triangle in the PVR, now I'm going to show you how to draw a triangle using OpenGL (via GLdc).


If you're really confused about certain topics in this tutorial, go check out my Drawing a Triangle with the PVR tutorial first!

Why OpenGL?


OpenGL is a relatively platform-independent graphics library that is almost universally used across a multitude of devices. It's relatively easy to use, and often forms the graphical basis for many cross-platform applications or libraries. The library provides a higher level way of communicating with the respective system's GPU.

Relevant Example Projects

  • Anything in kos/addons/GLdc/samples
    Specifically, the examples by Nehe are wonderful!
  • kos/examples/dreamcast/kgl


The Code


And that's it! Almost half the size of our PVR-rendered triangle, and this is including extraneous input!

Keep in mind, a lot of the work involved with OpenGL is abstracted away behind the libraries. No need to setup everything manually (like most OpenGL tutorials will teach you how to do). You're not going to be an expert in OpenGL after learning how to draw this triangle, but regardless, getting anything to draw on the screen is a victory, in my book!

I commented the code, so I won't be breaking it down line-by-line, but I do want to highlight some key similarities and differences between working with the PVR, and OpenGL.

The Draw Loop


The draw loop is pretty similar to the PVR.
First, we clear any of the buffer bits we need to clear. In this case, the only buffer bit we need to worry about is color. Then, we tell OpenGL we're about to draw something with glBegin(), telling it what kind of object we're planning on drawing. You can find these by looking at the OpenGL documentation.

After that, we're free to draw our vertices! Once we're done with that, we close it out with glEnd() and swap our video buffers with glKosSwapBuffers().


Video Buffers?
Modern day GPUs have what we refer to as "video buffers." These video buffers are a collection of pixels that are drawn to make up your screen! The reason they're called "buffers" is because the GPU  is actually drawing somewhere you can't see before it's ready to show you. It "buffers" the displaying of the image, making sure the next image (also known as a "frame") is ready before swapping it to your screen. Once the GPU puts the frame up for the world (or, specifically, you) to see, it takes the old one back into its little hiding place to draw over it.

This is commonly referred to as "swapping buffers," and is a practice all modern GPUs utilize. GPUs do this so that you don't visibly see it drawing your screen line-by-line.

The Dreamcast has a whole bunch of other buffers, in addition to the one drawing each frame for you, and most of them will probably need to be cleared/swapped out at some point.


Submitting Vertices to Draw


One key difference, which frees up a significant chunk of code, is how OpenGL handles submitting vertices to be drawn. What was 4 lines of code for the PVR is chopped in half!

First, we tell OpenGL what the color (the Red, Green, and Blue values) of our next vertex is going to be. Then, we tell it the X, Y, and Z coordinates of the vertex we want to draw.

You might remember that from the PVR tutorial, vertices (allegedly) needed to be submitted clockwise. OpenGL doesn't really require that. However, it does require you to sort of loop back if you want to continue a new triangle. Think of it as if you had one continuous line that you're connecting between points.

We'll get more into this in the follow-up tutorial, where we actually draw a pyramid, but for now you don't need to worry about looping back.


Local Space? World Space?
When submitting vertices to be drawn, you should keep in mind the idea that you're actually telling the vertices where they're going to reside with respect to each other (local space). It's good to keep the center of the object at (0,0,0) so that you can move it around in world space easier. Luckily, most 3D models won't be hand-coded like this, so you won't have to worry about it too much.

World Space and Local Space are a little tricky to wrap one's head around, but it'll make a lot more sense when we get into moving and rotating our objects around later!

If you want, a good example of this would be to go into Blender, take any object, enter edit mode, grab the entire object, move it to the side, exit edit mode (go back into object mode) and try and rotate the object.


Coordinates


OpenGL is a little funkier than the PVR, in that the screen actually goes from -1, to 1 (left and right sides of the screen respectively).


So, if our screen is 640x480 pixels, X=-1 in OpenGL would be the same as X=0 on the screen, and X=1 in OpenGL is would be the same as X=680 on the screen. X=0 in OpenGL would be smack-dab in the middle of c, at X=320.

It's a little confusing, but it makes sense if you think about it in a 3D space! Go to the left, and your X position will be less than 0. Go to the right, and your X position will be greater than 0.

If you're confused by this, try going into Unity or Unreal Engine and watch the coordinates of an object's position while you're moving it around!


And that's pretty much it! We have a triangle, just like the one we drew with the PVR! You'll notice we still don't have perspective, though! It's just a flat triangle on the screen. How do we fix that? In the next tutorial, I'll explain how to draw an object and display it in 3D!

If I did a poor job of explaining anything, please let me know! I'm a bit more familiar with this stuff, now, so I'm forgetting things that might be important to explain.

Saturday, August 4, 2018

Dreamcast Tutorial: Drawing a Triangle with the PVR

When diving into Dreamcast development, the PVR was the most confusing thing to me. Coming from a background of Unity and Unreal, having to directly access the graphics chip was a little strange.

A few summers ago I dove into the world of OpenGL, and quickly found myself way over my head! However, looking back, I ended up learning a lot more than I thought I did! Some of the concepts from learning OpenGL end up crossing over with the PVR, given how the functions are setup.

I'll attach the OpenGL tutorial I followed in the references below, in case anyone is interested!


What Is the PVR?

The PVR is the Dreamcast's built-in graphics chip. It handles all the heavy lifting when it comes to rendering. This is in contrast to software rendering (which people seem to love making tutorials about), which uses the CPU to render pixels on the screen and is much slower.

Slower? What do you mean?
Rendering using the PVR is much faster than using the CPU, because the PVR was literally made for this! The CPU would get bogged down by the 307,200 pixels it would have to draw. However, the PVR, and any graphics chip for that matter, is specifically designed to handle drawing all of those pixels!

It's always a bit confusing when people talk about "slower" and "faster" in regards to programming, but if you were to handle all of the rendering through the CPU, the CPU wouldn't have any time to do any other calculations, and your game's performance would suffer as a result.


There's a ton of documentation all over on the hardware, and how it functions, but very little on how to actually use it (aside from this tutorial, but quite frankly I was left a little confused afterwards).

The end goal of this tutorial will be to get something like the following on your screen using only the PVR! No OpenGL, no SDL, no software rendering!


Relevant Example Projects

  • kos/examples/dreamcast/png/example.c
    More or less what I'll be basing this tutorial off.
  • kos/examples/dreamcast/pvr
    Literally anything in here will be relevant, but probably more advanced.


The Code


A lot more here than the input tutorial! I don't want to break down every single line here, so I made sure to put a sufficient amount of comments to help people along! Also, if you're struggling to figure out where this is coming from, I'd highly encourage checking out the KOS documentation!

Initialization


First, we have to initialize our PVR. We do this by first setting up the video mode, more details on that can be found here, and then we initialize the default values for the PVR. If we don't do this, nothing will show up on the screen!

The Render Loop


Like most things in game development, we're going to want to draw our scene in a loop. Here we have our Draw() function sandwiched between a bunch of other nonsensical PVR-related functions. The comments should help, but the big idea here is that we're setting up a list of polygons to draw with pvr_list_begin, and then calling a function that handles the drawing of them.

I included the transparency list from the aforementioned PVR tutorial just to show where it'd go if you had anything that needed transparency.

The Draw Function


Here we handle setting up our PVR polygon context, header, and vertices we're going to be rendering.

Again, most of this is already commented, so I won't explain a ton. The idea is that we need a PVR header in order to actually render anything. We take our context, with our list of polygons to render, and compile it into a header that the PVR uses to render our vertices.

The Vertices


Here we have a single vertex. The pvr_vertex_t struct consists of X, Y, and Z values for positioning (Z being depth), and U and V values for texturing. Vertices are a big part of 3D, so if you're not familiar with them, I'd recommend brushing up on things. Download Blender, mess around with it, and things will start to make sense.

Note: The aforementioned PVR tutorial makes a point to state that triangle vertices must be rendered in a clockwise fashion. Rendering them in any other order may result in issues.

We also have my favorite part: The color! Our vertices' colors (vert.argb) consist of an alpha value (transparency), followed by our red value, green value and finally blue value! We use PVR_PACK_COLOR to get our color values.

You can change these colors to whatever you want! I just went with the traditional red corner, green corner, and blue corner.

And that's pretty much it! We pack our vertices into primitives to render, the PVR runs through our list of vertices, and boom! Triangle!


A Few Notes


If you're like me, you probably tried to mess with the Z-values of the vertices to see if you could do something fancy. If you did, you'll probably notice you'll get something weird like this (where the bottom-right Z value is < 1)


Why is that? Isn't Z our depth? Well, it is, but this is showing us that our camera is rendering in orthographically, and not with perspective.

An example of perspective vs orthographic projections. Author: Unknown

If you trick your mind into believing that the red corner in the triangle above being really far away, it makes a little more sense.

I'm not quite sure how to get perspective working just yet, but I'm quite eager to find out! I'd really love to provide some solid tutorials on how to work with a camera in a scene, once I figure it out, myself!

References